Somewhere inside your product there’s a job that runs constantly and never changes shape: classifying the ticket, extracting the fields, picking the tool, tagging the upload. It’s narrow and well defined, which is exactly what makes it feel like it shouldn’t cost what it costs, and yet every one of those calls goes out to a frontier model at frontier prices.
You probably already believe a smaller model would handle it, so what gets in the way is the shape of the work rather than the idea. You have to choose a base model, build a data pipeline, find GPUs and write an eval harness, and you have to do all of that before you know whether the task is learnable in the first place. That’s a week of somebody’s time spent on a maybe, which is usually enough for the whole thing to stay on the list instead of getting built.
We’ve spent this year cutting that week down, and what’s left of it is the six stages below.
What is distil labs
distil labs is a platform that fine-tunes task-specific small language models automatically. We take the production traces you already collect, use a large teacher model to turn them into synthetic training data, fine-tune a small student on that data, and deploy it to an OpenAI-compatible endpoint you call like any other model.
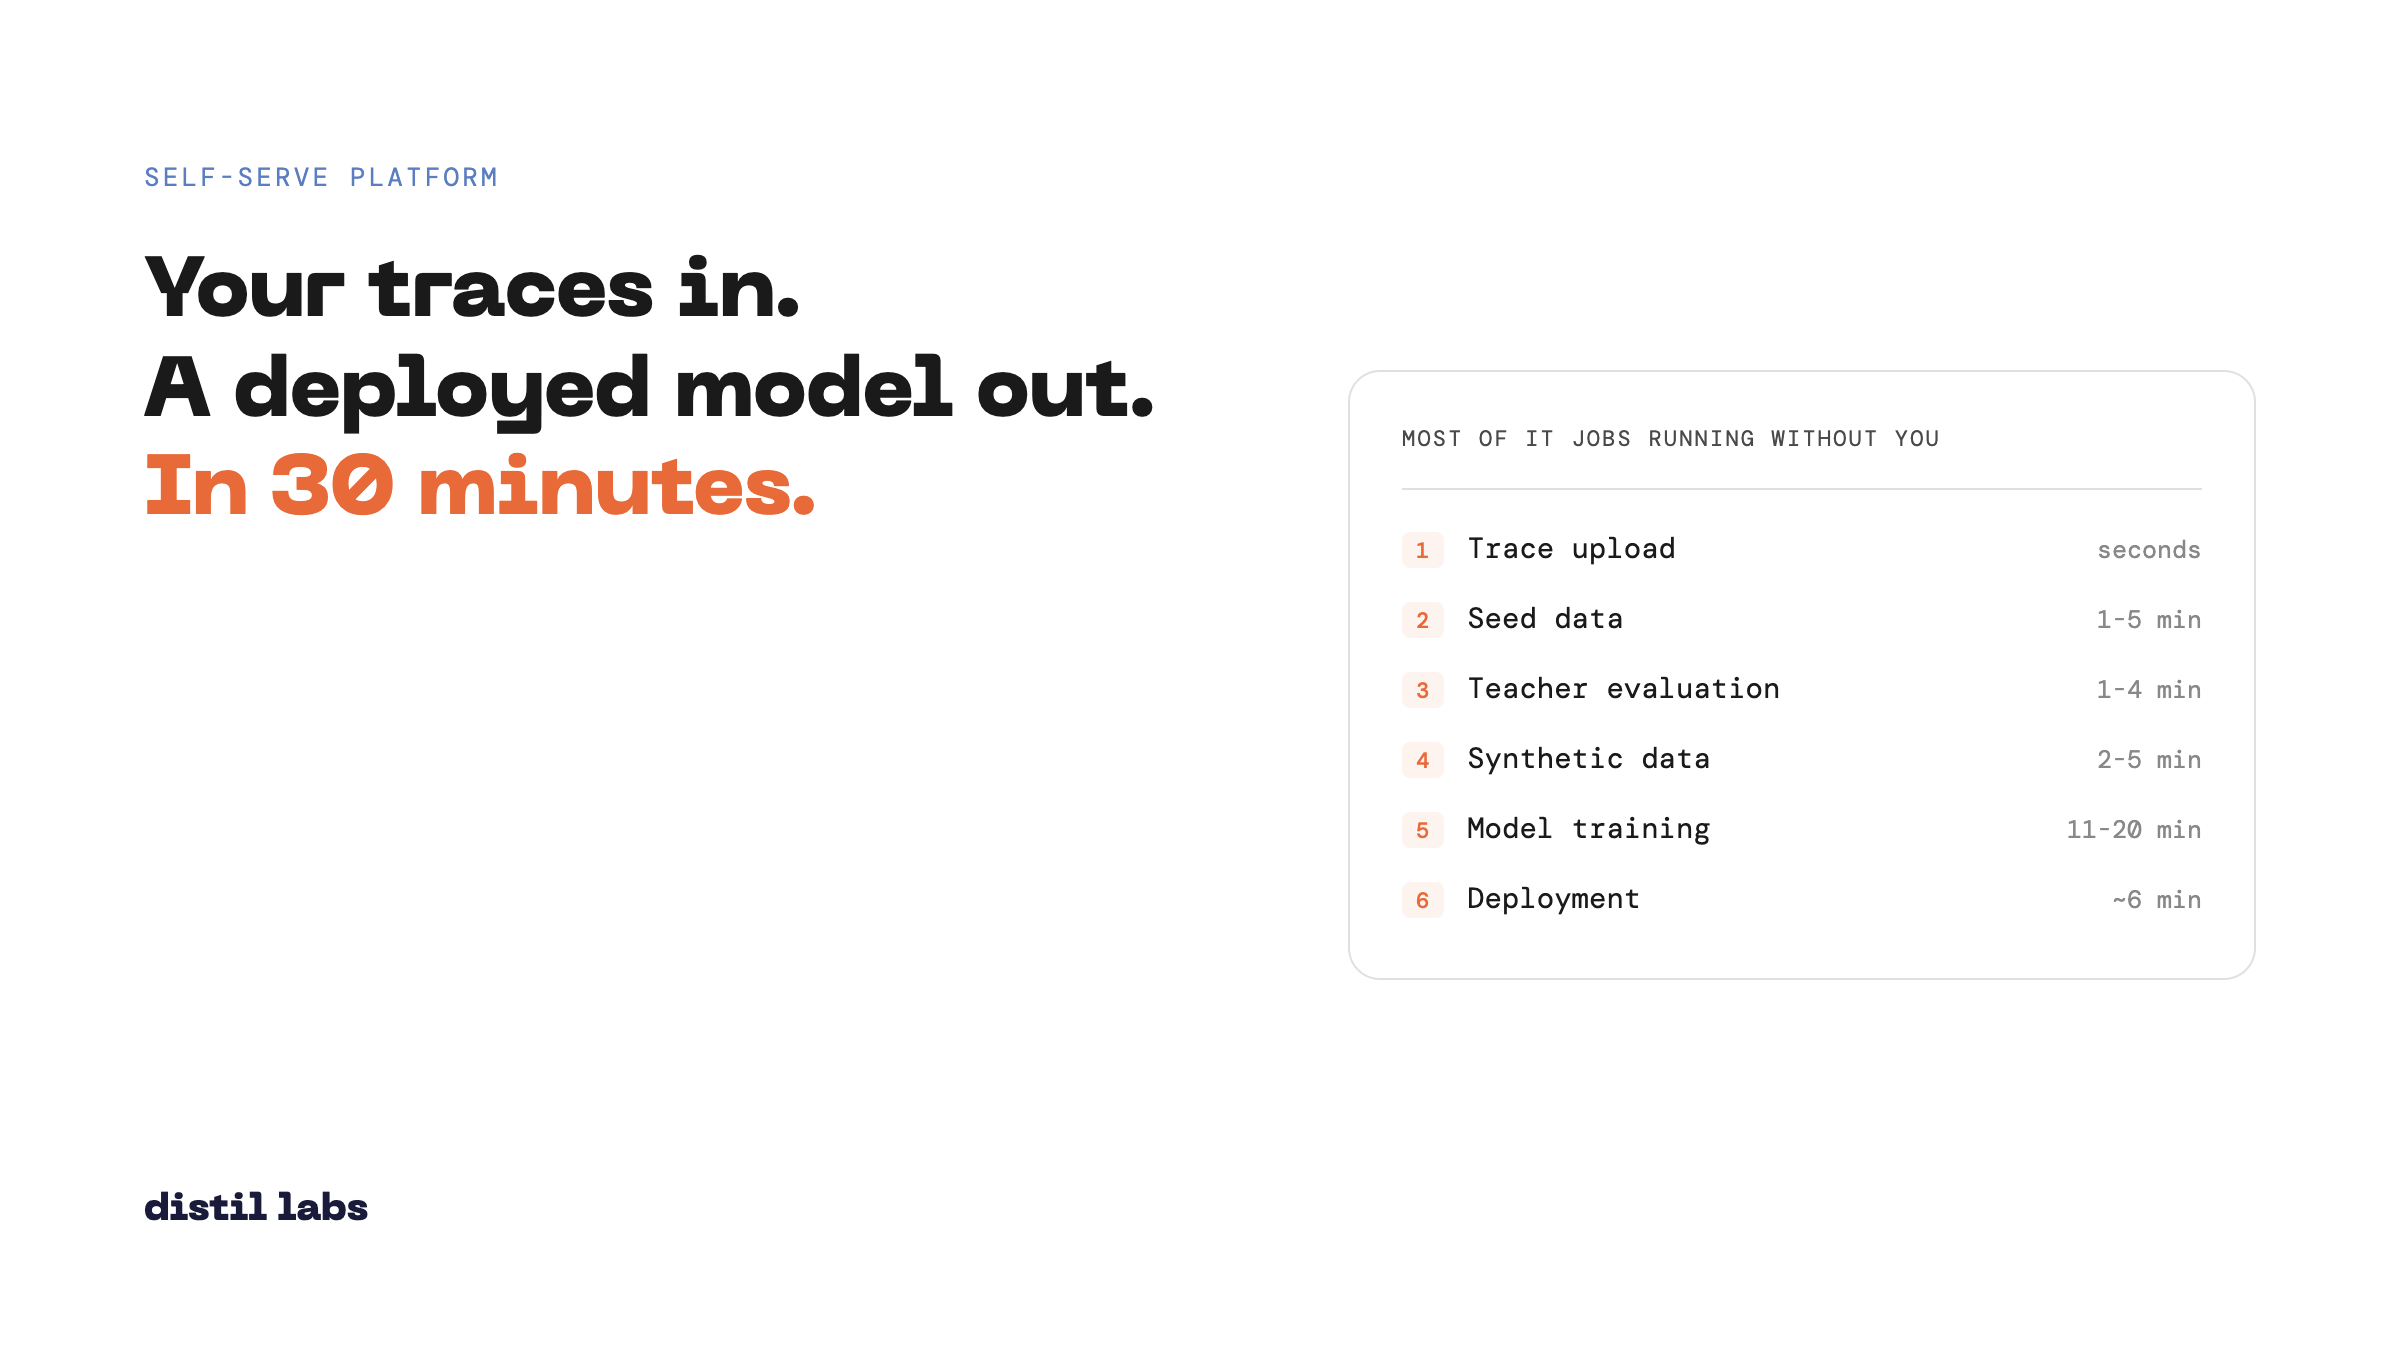
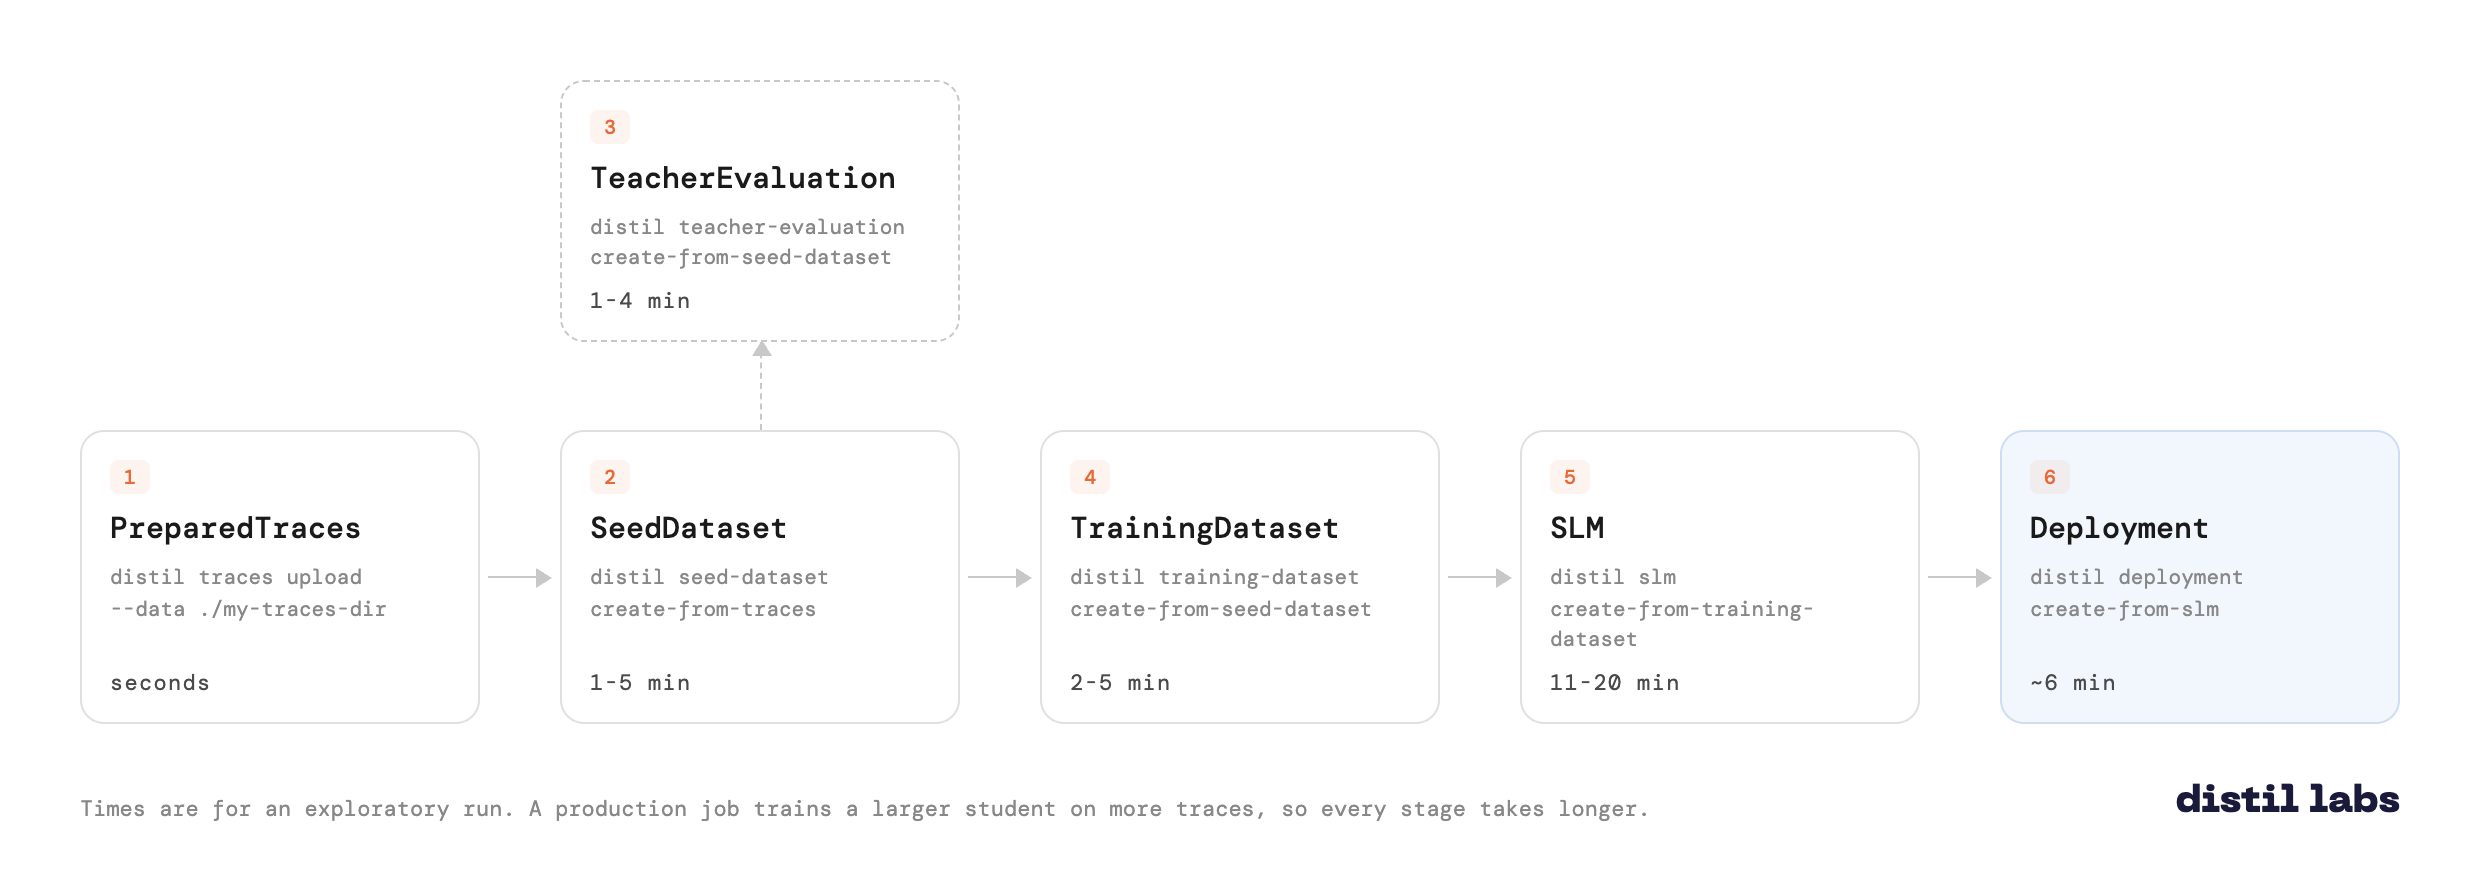
Training one of these models breaks into six stages, and what you bring to it is the logs your current model already produces plus a description of the job it does. A first model takes about 30 minutes end to end, and most of that is jobs running on our hardware while you do something else. You can drive the whole sequence yourself from the CLI, or install our skill and hand it to your coding agent instead.
The workflow
Each stage produces a named entity, and every entity after the first is created by naming the id of the one before it, which makes those ids the currency of the whole pipeline. They’re the same ids whichever way you drive it.
| Stage | What comes out | Time |
|---|---|---|
| 1. Trace upload | PreparedTraces |
seconds |
| 2. Seed data | SeedDataset + your current model’s score |
1-5 min |
| 3. Teacher evaluation | TeacherEvaluation + the teacher’s score |
1-4 min |
| 4. Synthetic data generation | TrainingDataset |
2-5 min |
| 5. Model training | SLM + base and tuned scores |
11-20 min |
| 6. Deployment | Deployment + an inference endpoint in front of it |
~6 min |
Those times are for an exploratory run, sized so you get through the whole pipeline quickly. A production job works from far more traces and trains a larger student, so every stage stretches, and training stretches the most.
The pipeline itself doesn’t change with the way you reach it: you can run it using the CLI or use Claude Code to run it for you. Both share the same configuration and the same entity ids, so a run you start in the terminal continues in Claude without exporting anything. The dashboard at app.distillabs.ai is read-only, for watching jobs without a terminal.
Install the CLI and create an account:
curl -fsSL https://cli-assets.distillabs.ai/install.sh | sh
distil signup
Then install the skill once and let your agent do the rest:
distil skill installOne note if you were already using the platform before this update: jobs you left half-finished under the old flow don’t carry over, so start those runs again from the beginning.
The six sections below take the stages in order, and each one covers what the stage does, what you get out of it, and how to run it both ways.
Stage 1: Upload your traces
What it does. Nothing runs yet. This stage is where you define the problem, by choosing which of your logs represent the job you want the model to do and writing the job description that says what that job is. Picking the right traces and describing the job well is the real work here, and it decides everything that follows.
What you get. A PreparedTraces entity holding your traces, the job description and the config. No job runs against it, so the command returns as soon as the upload finishes.
From the CLI. The input directory holds traces.jsonl, job_description.json and config.yaml, plus a curated test.jsonl if you have one:
distil traces upload --data ./my-traces-dirFrom your coding agent. It converts your logs into the trace format, picks the task type, and drafts the job description with you.
Stage 2: Seed data
What it does. This is where the processing actually happens. The platform filters your traces for relevance, has a teacher rewrite the assistant answers rather than trusting what the old model said, and splits the result into train and test, keeping the leftovers as unstructured context. It also scores your current production model on the test set it just generated, and that score is the number the new model has to beat.
Relabeling is on by default and worth leaving on. With it off, the original answers pass through unreviewed and the student only learns to imitate the model you’re trying to replace.
What you get. A SeedDataset holding train, test and unstructured data, together with the original model’s score and its per-example predictions. The defaults take 200 traces as the training base and 200 as the testing base. Look at the generated test set before you go any further, because it gates every score that comes after it.
From the CLI:
distil seed-dataset create-from-traces <prepared-traces-id>From your coding agent. It runs a small slice first to see how many traces survive filtering and relabeling, compares the processed rows against the raw traces for length and topic coverage, and walks the generated test set with you before committing to the full run.
Stage 3: Teacher evaluation
What it does. A large teacher model answers your entire test set, which tells you the score the task can reach before you’ve spent anything on GPUs. The teacher can be any LLM, and most of our production jobs use GLM-5.2.
This is the stage people want to skip and the one that saves the most time, because a low teacher score almost never means the task is too hard for a small model. It usually means the task description is ambiguous or the labels disagree with each other, and no amount of training will fix either of those.
What you get. A TeacherEvaluation carrying the teacher’s score along with its per-example predictions, and the predictions are the part worth reading, because the failure patterns live in the rows the teacher got wrong rather than in the average.
From the CLI:
distil teacher-evaluation create-from-seed-dataset <seed-dataset-id>From your coding agent. It starts the job, watches it in the background instead of blocking, then reads the score and the failure patterns and tells you whether to proceed or fix the task setup first.
Stage 4: Synthetic data generation
What it does. The teacher writes the training data for you. Your seed rows fix the format and the style, and the teacher varies everything else, including phrasing, edge cases, and the combinations your logs happen not to contain. Rule-based validators then filter what comes back for length, format, schema, and novelty.
config.yaml is what steers the mix, so if your task has rare classes that matter you can force them to appear often enough for the student to learn them, rather than inheriting whatever imbalance your production traffic happens to have.
What you get. A TrainingDataset, plus a free sample command that returns up to 128 rows, so you can read what the teacher actually wrote before you train on it.
From the CLI:
distil training-dataset create-from-seed-dataset <seed-dataset-id>From your coding agent. It runs a cheap smoke generation first, reads the sample, checks the rows look like your task, and only then submits the full run. That check costs a few minutes and catches a bad config before it becomes a bad model.
Stage 5: Model training
What it does. The platform scores the untrained student first to give you a base, then LoRA fine-tunes it for 4 epochs on the synthetic data and scores it again on the same test rows.
Having two numbers on one test set is the point of doing it that way, because it shows you what the training did rather than what the model happens to be. For production work the students that tend to earn their place are Qwen3.5-4B and Qwen3.5-9B.
What you get. An SLM with base and tuned scores, the tuned model’s predictions, and the model tarball if you want to run it yourself.
From the CLI:
distil slm create-from-training-dataset <training-dataset-id>From your coding agent. It confirms the student and the credit cost with you before submitting, watches the job, then reads both scores back and applies the rule in the next section.
Stage 6: Deployment
What it does. vLLM serves your model on our hardware, and an OpenAI-compatible inference endpoint in front of it takes the requests, falling back to a model you name when the deployment can’t answer.
What you get. A Deployment, an inference endpoint to call it through, plus model_client.py, which carries the system prompt the model was trained with and the decoding settings it expects. It’s worth using, because the difference between “correct” and “nearly correct” on a first call is usually a prompt that doesn’t match the one the model trained on.
A deployment is a session rather than a permanent endpoint, so it stops after six hours or after an hour with no traffic, and it’s worth deleting yours once you’re done with it.
From the CLI:
distil deployment create-from-slm <slm-id>
distil inference-endpoint create-from-deployment --name <name> \
  --fallback-model <owner/model> <deployment-id>
From your coding agent. It creates the deployment, waits for it to actually serve before putting the endpoint in front of it, sends a test request, and shows you the response.
That’s the whole pipeline: six create commands take you from a directory of logs to a live endpoint, plus one more to put the endpoint in front of it.
Reading the result
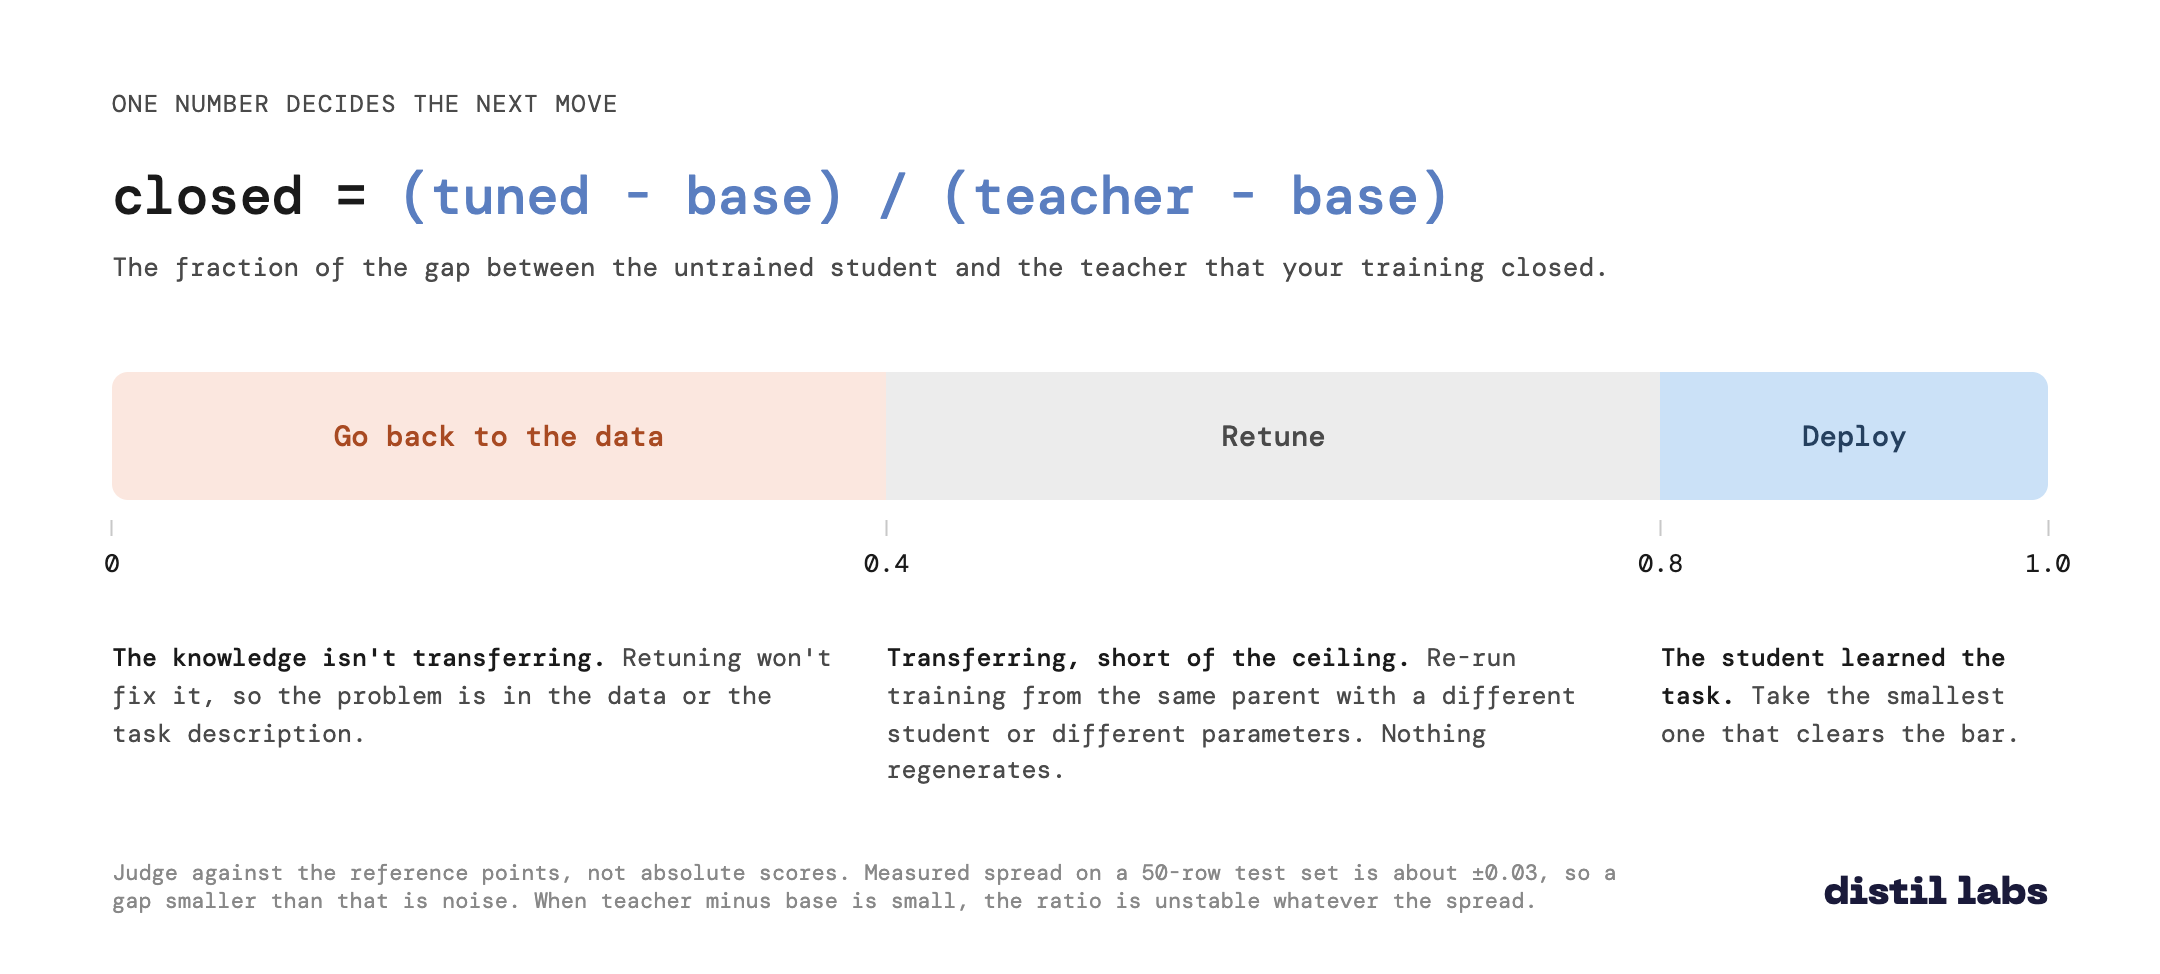
You now have three numbers: base, tuned, and teacher. One formula turns them into a decision:
closed = (tuned - base) / (teacher - base)That’s the fraction of the gap between the untrained model and the teacher that your training closed.
closed |
What it means | What to do |
|---|---|---|
| 0.8 and above | The student learned the task | Deploy. On a sweep, take the smallest student that clears the bar |
| 0.4 to 0.8 | Transferring, but short of the ceiling | Retune. Re-run training from the same data with a different student or different parameters |
| Below 0.4 | The knowledge isn’t transferring | Go back to the data. Retuning won’t fix this |
The whole point is to judge against those reference points rather than against absolute numbers, which is why 0.72 is a good result against a teacher at 0.75 and a poor one against a teacher at 1.00.
Two things keep this honest. Scores are samples, not constants: our judge runs at non-zero temperature, and on a 50-row test set the measured spread is about ±0.03, so a gap smaller than that is noise and no band is decidable. And when teacher - base is itself small, the ratio is unstable whatever the spread, because you are dividing by a number close to zero. Treat closed as a gate for judgment, not a threshold to apply mechanically.
There’s a fourth number too, the one stage 2 gave you for the model you’re replacing, and it works as a floor rather than a gate. A student that scores below the incumbent isn’t shippable whatever closed says, because a strong closed against a weak base can still lose to the model already in production.
The retune loop is deliberately cheap, because an iteration is the same parent entity submitted again with a different config, so nothing regenerates and you’re only paying for the training. The one thing to watch, and it fails silently, is that an override replaces the config file whole rather than merging into it, so read the parent’s config, change the one field, and send it back entire.
Does it work
Here’s what came out of five recent pieces of work, each one linked to its full write-up.
| What we measured | Result |
|---|---|
| Whole conversations, content and tool calls together, 359 turns | Tuned Qwen3-1.7B scored 0.886 against the GLM-5 teacher’s 0.869. Base model: 0.524. On tool calls alone, 0.806 against the teacher’s 0.597 |
| Six tasks, Nemotron 3.5 Lightning | Tuned, it beat its 550B teacher on 4 of 6 tasks, by up to +0.369. The two it lost were -0.010 and -0.033, at or inside the noise band |
| Seven tasks, four mid-size MoE models | Base-model rank doesn’t predict tuned rank. The weakest base gained the most and tied for first |
| Request classification at hundreds of millions per month | Accuracy 81% to 93%, inference cost down 68%, replacing Gemini 2.5 Flash Lite |
| Scam detection, 374 held-out documents | A sub-1B model: precision 91% against the production model’s 74-85%, false positives 3.5% against 6-10%. Detection rate 82% against a 71-83% range, which is parity rather than a win |
The pattern holds across all five: a fine-tuned small model matches or beats a far larger model on one narrow task, and costs much less per request to run.
Start
If you have a task in mind, start with a short description of it and the logs your current model already produces, and we’ll take it from there.
curl -fsSL https://cli-assets.distillabs.ai/install.sh | sh
distil signup
distil traces upload --data ./my-traces-dir
Or install the skill from further up this page and ask your agent to build the model with you.
distil labs trains task-specific small language models that are cheaper and faster per request than general-purpose LLMs, with equal-or-better accuracy on bounded tasks. Docs · GitHub · Slack